
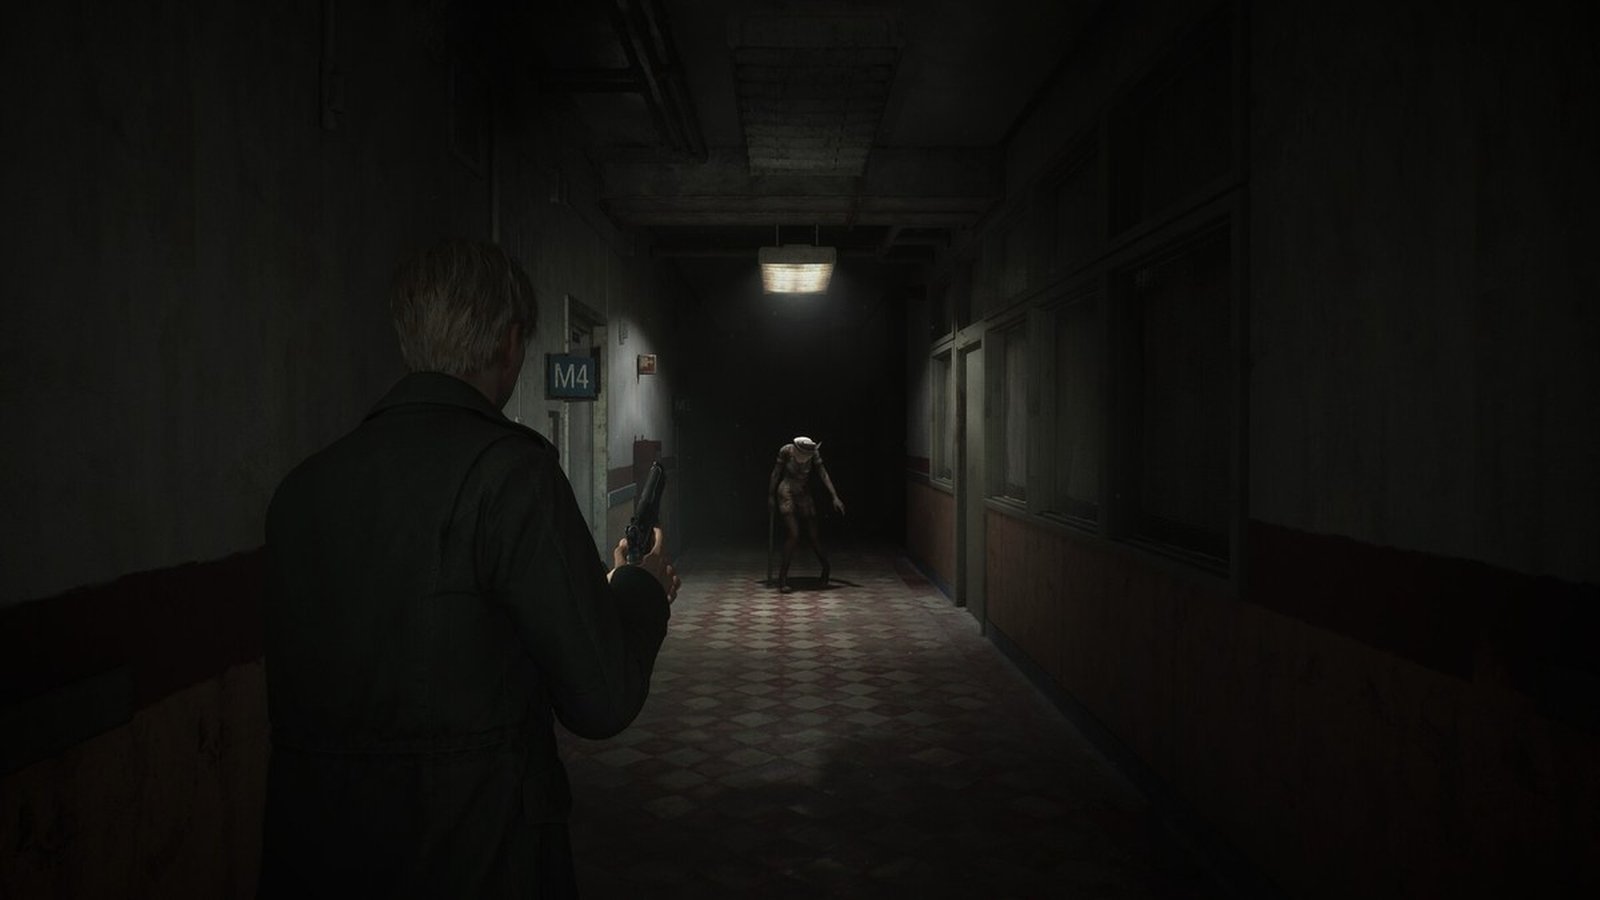
Surviving the fog-drenched streets and decayed corridors of Bloober Team’s critically acclaimed psychological horror masterpiece requires calculating every single bullet. In our comprehensive Silent Hill 2 Remake Hard Mode Combat Guide, we break down essential resource routing, melee iframe windows, and decisive boss fight strategies to overcome Pyramid Head and the relentless nightmare creatures of South Vale.
Hard Combat Difficulty Modifiers
- Enemy Aggression: Mannequins and Nurses attack in coordinated flanks with 40% reduced recovery telegraphs.
- Resource Scarcity: Handgun and Shotgun ammunition pick-ups are reduced by 55% compared to Standard difficulty.
- Damage Multipliers: James Sunderland takes fatal damage from just two unmitigated strikes from heavy enemies.
- Stamina Depletion: Chained dodges incur escalating stamina cooldowns, preventing infinite dodge-roll spamming.
Mastering Melee Combat: The Wooden Plank and Steel Pipe
Conserving firearms ammunition is the golden rule of Hard Mode survival. Players who discharge handgun rounds at standard roaming Lying Figures during the early Blue Creek Apartments chapter will find themselves completely bankrupt of supplies when encountering Flesh Lips or Abstract Daddy later in the campaign.
Every melee weapon features a tight 0.3-second invulnerability window during James’s side-step dodge. By allowing an enemy to initiate their strike animation, dodging diagonally backward, and executing a charged horizontal swing, you can stagger Mannequins without taking scratch damage. Once downed, immediately initiate the ground stomp to prevent resurrection.
Ammunition Conservation & Resource Efficiency Matrix
Managing James’s inventory across the 15-hour campaign demands ruthless efficiency. The telemetry table below outlines weapon damage output, optimal engagement ranges, and recommended ammunition reserves for Hard Mode survival.
| Weapon Name | Base Damage per Hit | Optimal Range | Stagger Probability | Recommended Reserve Ammo |
|---|---|---|---|---|
| Steel Pipe | 75 HP (Melee) | Close (1-2 Meters) | Moderate (65%) | Infinite Durability |
| Handgun (9mm) | 45 HP per Shot | Mid (5-12 Meters) | Low (25%) | 18 – 25 Rounds |
| Shotgun (12-Gauge) | 190 HP (Point Blank) | Point Blank (0-3 Meters) | Guaranteed (100%) | 6 – 10 Shells (Boss Only) |
| Hunting Rifle (.308) | 320 HP per Shot | Long (15+ Meters) | Knockdown (100%) | 4 – 8 Rounds |
Blue Creek Apartments: The First Pyramid Head Encounter
The infamous apartment staircase duel against Pyramid Head (The Red Pyramid Thing) has ended dozens of Hard Mode speedruns. The crucial realization that many players overlook is that this encounter operates on a hidden countdown timer rather than an aggregate HP threshold.
Discharging firearm ammunition against Pyramid Head during this first encounter is entirely unnecessary. The Great Knife’s sweeping attacks possess immense reach, but his turn velocity is remarkably slow. By maintaining perimeter kiting around the rusted metal table in the center of the room, you can sprint past his recovery swings without firing a single bullet until the siren sounds and he descends into the flooded corridor.
Brookhaven Hospital: Dealing with Coordinate Nurse Patrols
Bubble Head Nurses in Brookhaven Hospital represent the most lethal common enemy type on Hard combat settings. They carry pipes or scalpels, sprint unpredictably, and often conceal themselves inside pitch-black patient rooms. Turning off James’s flashlight is essential for stealth navigation.
When confrontation is unavoidable, bait their triple-slash combo from outside their reach. The third swing carries a heavy forward lunging recovery. Step inward immediately to land two heavy Pipe swings, followed by a quick retreat before they counter with a sweep.
Lakeview Hotel: Dual Pyramid Head Final Confrontation
In the final act, James must battle two Red Pyramid Things simultaneously. To survive this brutal arena on Hard Mode:
- Equip the Hunting Rifle: Save at least 12 rifle cartridges throughout Brookhaven and the Historical Society exclusively for this fight.
- Separate the Line of Sight: Position James so that one executioner is blocked behind the iron staircase pillars while targeting the other.
- Shotgun Stagger Windows: When one rushes with the Great Spear, fire a shotgun blast to interrupt their charge animation before repositioning to the opposite corner.
Toluca Prison Abyss Navigation: Flashlight & Creeper Management
Descending into the subterranean chambers of Toluca Prison represents one of the steepest difficulty spikes in Silent Hill 2 Remake on Hard Mode. The prison corridors are plunged into total pitch-black darkness, and ammo pickups are spaced hundreds of meters apart. Relying on James’s chest flashlight alerts swarms of ceiling Creepers and wall-crawling Mannequins from across entire cell blocks.
To survive this nightmare chapter without expending scarce shotgun shells, players must learn the art of ‘blind navigation.’ Toggle your flashlight on for a fraction of a second to memorize corridor landmarks, then immediately switch it off and navigate by hugging the right-hand wall. Listen closely for the frantic scurrying of Creeper legs; when heard, ready the Steel Pipe and execute a downward sweep to crush them in a single blow before they latch onto James’s legs.
Abstract Daddy Boss Arena: Industrial Piston Timing
The claustrophobic encounter with Angela’s psychological tormentor, Abstract Daddy (the Ideal Father), takes place within a narrow hallway bordered by slamming hydraulic pistons. On Hard combat difficulty, the monster’s charging grapple attack is virtually an instant kill, draining 85% of James’s maximum health bar.
The optimal combat strategy requires patient baiting. Stand at the far end of the corridor and aim your Hunting Rifle at the fleshy core beneath the iron bedframe. When the creature rears back to charge, wait until he reaches mid-sprint before dodging sideways into the shallow doorway alcoves. His charging momentum will cause him to slam into the opposite wall, stunning him for three full seconds—the exact window needed to fire two point-blank shotgun blasts into his exposed underbelly.
Audio Cues and DualSense Haptic Feedback
Bloober Team’s implementation of 3D audio and controller haptics provides life-saving situational awareness on Hard Mode. The static hiss of James’s pocket radio changes frequency and panning depending on enemy proximity. Furthermore, subtle directional controller vibrations indicate the subterranean movement of Mandarins concealed beneath metal grate flooring, signaling exactly when to sprint forward to avoid being dragged down into the darkness.
Health Drink vs Syringe Management: The Red Screen Threshold
Resource hoarding is crucial for late-game survival. Health Drinks restore approximately 35% HP, while First Aid Kits restore 70% and Syringes grant full restoration alongside temporary stamina regeneration. On Hard Mode, never consume a healing item while James’s screen is merely pulsing with light vignetting. Wait until the deep crimson vignette and audible heartbeat audio cue trigger before applying a Health Drink, maximizing the raw HP value recovered per inventory slot.
Psychological Horror & Visual Symbolism in Modern Remakes
Beyond its demanding survival combat mechanics, Silent Hill 2 Remake stands as a monumental achievement in psychological narrative design. Bloober Team has painstakingly preserved and expanded upon the original team Silent vision, embedding deeply unsettling environmental symbolism throughout South Vale and the Otherworld.
Every manifestation encountered by James Sunderland—from the twitching, contorted forms of the Mannequins to the towering, rusted executioner guise of Pyramid Head—reflects his repressed guilt, grief, and subconscious desire for punishment. The sound design, composed by Akira Yamaoka alongside modern spatial audio enhancements, immerses players in an acoustic landscape where industrial machinery groans and distant whispers blur the line between reality and hallucination, solidifying its place as one of the definitive horror experiences in modern gaming.
Frequently Asked Questions
Can you switch the combat difficulty setting mid-game in Silent Hill 2 Remake?
No, once you initiate a playthrough on Hard Combat or Hard Puzzle difficulty, the setting is locked to your save profile. Lowering the difficulty requires starting a new game.
Do enemies respawn on Hard Mode in Silent Hill 2 Remake?
Certain open-street sections of South Vale will spawn additional roving enemies after major narrative cutscenes, but enclosed dungeon rooms (Apartments, Hospital, Prison) feature persistent enemy clearance once defeated.
Does using New Game Plus weapons void the Hard Mode trophy/achievement?
Unlocking the Chainsaw on NG+ allows you to breeze through Hard Mode combat while still unlocking completion trophies, making it a viable strategy for completionist players seeking platinum status.
Related posts:
 Star Wars: Zero Company Review: Glitches & How to Fix Them
 The Last of Us Part 1 Review & Franchise Guide: PS5 vs PS4 Remaster, Buying Guide & Part 3 Leaks
 Metaphor ReFantazio Review & Archetype Mastery Guide: Best Party Setups, MAG Farming & Time Management
 Castlevania: Belmont’s Curse Review & Combat Guide: Rose Belmont in Paris